In this post, we have a how-to tutorial on how to burn MP4 to DVD using Wondershare Uniconverter so that you can watch the video content through your DVD player.
We live in a digital era, where conventional storage media such as DVDs and CDs are nearly extinct. For watching movies and listening to music, we have various options.
Despite all these, DVDs are still a notable form for conveniently storing and watching your favorite media. So, you can’t be surprised if one of your clients demands the output footage in DVD format.
Convert & Burn MP4 to DVD

As a professional, you would first need to get the desired quality and convenient format for your client, for which you require a good video converter. Once you’ve got the output in a portable format—say, MP4—the next thing is to burn the media into a DVD.
Note: We use MP4 video format, which is the most supported format. We always want to avoid situations where older DVD players fail to recognize the media on your disk.
Obviously, the default DVD-burning solution in Microsoft Windows or Macintosh wouldn’t be enough. So, you would have to use a professional, third-party, and effective way to burn your media files.
But wait. Wouldn’t it be awesome if you could combine the conversion and burning options into one solution?
Wondershare UniConverter — The Tool We Use
Wondershare Uniconverter is an all-in-one solution for converting video files to any format and doing more. Also, you can convert DVD to MP4 and digitize your movie collection.
In this case, however, you can burn Mp4 to DVD for easier access.
Now, we shall move on to the tutorial for burning an MP4 file into a DVD. By the way, if you do not have the output file in MP4 format, you can use Wondershare Uniconverter to convert it.
Since the tool is available for both Windows and Macintosh, you can use the same tutorial to burn your iMovie projects to DVDs.
Step 1: Install Wondershare Uniconverter
First, download and install Wondershare Uniconverter on your Windows or PC. There are free trials and premium plans available, which you can choose according to your budget. If you are on a tight budget, you can check for better pricing on our Wondershare Uniconverter coupons page.
Once you have finished installation, open the tool to get things moving.
Step 2: Setup Burn
As you can see, Wondershare UniConverter has three main tabs on the left side of the interface: Home, More Tools, and My Files. Click on the Home or More Tools tab to select DVD Burner.
Step 3: Select Files to Burn MP4 to DVD
You have to click on the ‘Add Files’ button and select the files you want. You can even drag and drop the files. There is an option for adding multiple files at a time.
Once you finish adding the files, you can see the total amount of space your selected media will take up on the DVD.
Step 4: Choose Burn Settings
On the ‘‘DVD Burner‘‘ tab page, you have several options from which you can choose. Before you choose the files to burn, you better make sure that you have the best settings. You can change the following factors on this page.
- DVD Type: You can choose one from the DVD5 or DVD9 variants available. To create Blu-ray discs, you can choose from BD25 (25GB) or BD50 (50GB).
- Quality: There are three options available — High Quality, Standard, and Fit to Disc
- Aspect Ratio
- TV Standard — you can choose NTSC or PAL.
Step 5: Choose Destination
In Wondershare Uniconverter, you have different options for burning MP4 to DVD. The first option is to choose the DVD that you have inserted.
Alternatively, you can create an ISO file or DVD Folder consisting of the selected files. So, you can choose according to your requirements.
Step 6: Advanced Options
You can use advanced options for each video you add to the DVD. For instance, the tool lets you add a subtitle file or change the audio codec. You can even edit video files before you burn them.
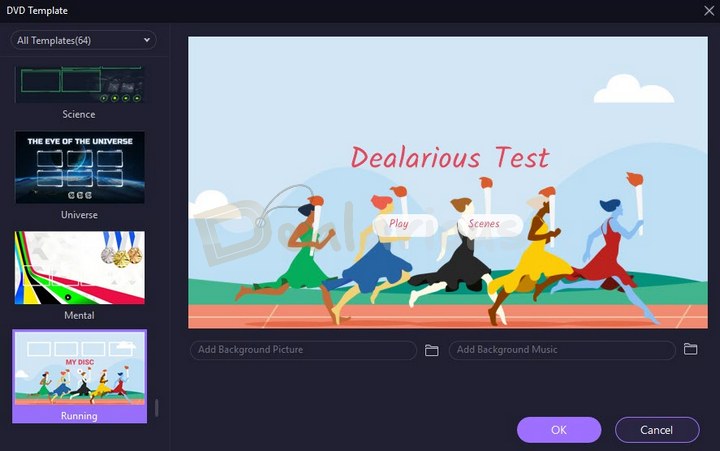
Step 7: Choose a Template to Burn MP4 to DVD

You can either choose a pre-installed DVD Template from the list or customize the template. For instance, you can change the menu background image or add background music.
Once you have selected the options, you can click on ‘OK.’
Step 8: Burn MP4 to DVD Finale
Once you click on the ‘Burn’ button, the burning process starts immediately. When the DVD burning is over, you can have the desired output in the selected form — DVD, ISO, or DVD Folder.
Before We Conclude
We have now shown you one of the best ways to burn MP4 to DVD for easier viewing and management. As we said, this tool is also available for Macintosh and is useful for burning your iMovie projects into a DVD.
Please note that the burning process is quite feature-rich and effective in the long run, giving you options for slides and advanced settings such as aspect ratios and TV standards. Altogether, we think using Wondershare Uniconverter is pretty simple and useful. We hope it helps.
The three attributes that define me- Tech lover, Blogger, and Dog lover. I primarily cover Cyber Security, online privacy, and also have keen interest in exploring new software that make daily computing easier for home users. I do love to spend quality time away from the internet, so when I am not online, I either cook or bike.